SIMPLE TOOLS FOR LEAK DETECTION: DYE TESTING
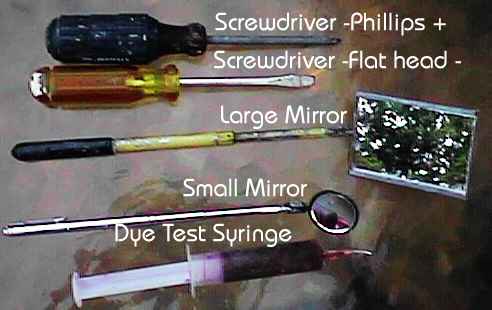
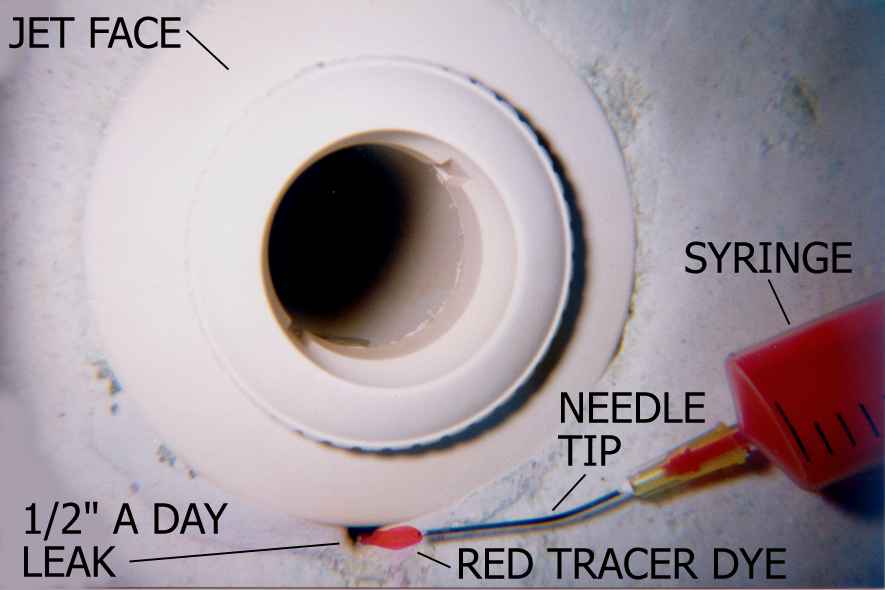
Dye testing is a simple yet powerful method for finding a leak in a swimming pool. The pool must be off and the current calm! It is done by squirting red dye (food coloring, red dye from the test kit, beat juice?) from a medical syringe near any holes or crevices that are found in the pool wall. When the dye gets sucked in near a hole, you have found your leak! Done properly it fast and easy. Here are some tools you should have.
It is important to understand the "feel" of dye testing. I constantly get calls from customers who claim to have squirted dye all around and didn't see anything. When I get to the pool, I asked the customer to demonstrate his method of dye testing: Standing up, he squirted dye over the entire surface of the pool from 4 feet away, waited a bit, then said "see it doesn't go anywhere". PLEASE DO THIS PRACTICE TEST!! Once you find your first leak you will immediately see how simple it really is. Until then you will be confused. The best way is to practice is with a water filled 5-gallon bucket that has holes in it causing it to leak when filled with water. Drill 1/16"-1/4" holes near the bottom and also make a thin crack or a slit in the plastic to represent a thin seam leak. A 1/4" hole in your pool will cause the pool to loose 1/4" per 24hr.. With the water in the bucket calm, slowly insert your arm and dye syringe near these "known leaks" and gently squirt the dye near the leak until you have the control of a steady stream of dye drawing directly into the leak. With the crack and the smallest hole, you will have the needle on top of the leak, with the biggest hole the leak will be apparent about 1/2" away. Test the crack and all the holes to get a feel for what you're looking for: Play with the boundaries of control: flood the leaks with dye, swirl your hand until you can't see the leak etc. Only then, grasshopper, it will be time for the pool: Turn the pump off, don't splash around or make waves. Move your hand slowly through the water. The water current from your hand can over power the current of the leak. We will show you exactly where to look in the other chapters.
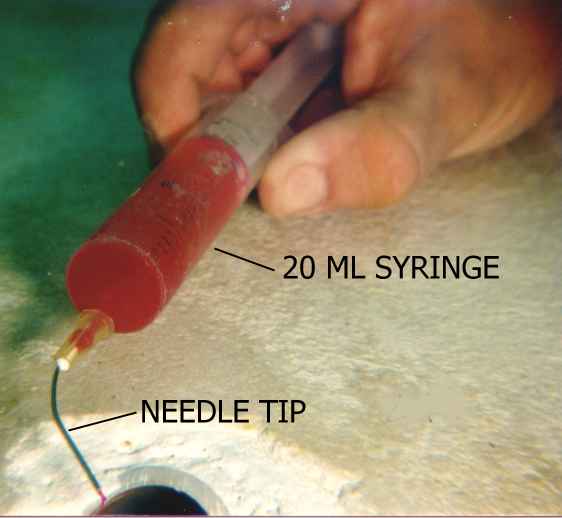
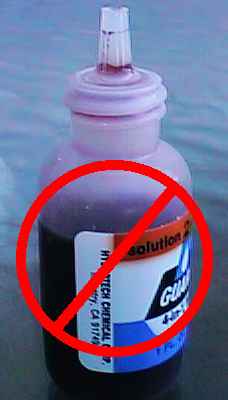
<BIG MISTAKE: Don't substitute the dye test syringe with the red bottle from your chemical test kit. The tip of the bottle is too fat and not precise enough for a small thin leak, you will over look the leak and you will become frustrated. For a quick test you can use it, but if you don't find your leak it may be the problem. A source for large syringes may be your pets veterinarian. Too small of a needle will clog quickly. Use the dye from the red bottle in the syringe, or a dye tablet from a toilet tank leak test kit available from the plumbing supply stores.

Sears sells a good inspection mirror in the automotive section, Sears craftsman mirrors are guaranteed for life. Some pool stores sell the prefilled blue dye syringe made by Anderson manufacturing. Also their website LEAKTOOLS.COM is an excellent source for plugs, epoxy, and all sorts of other leak detection supplies. These guys are so big the supply 90% of the industry with rubber plugs for pressure testing.
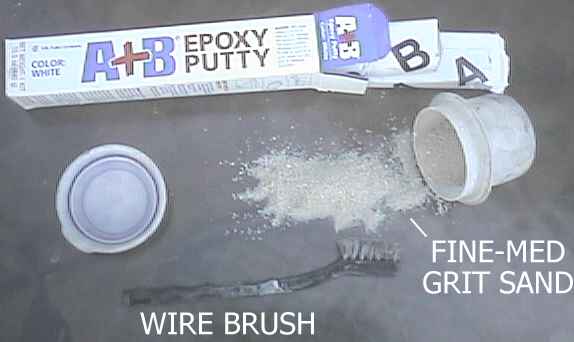
To repair the leak a 2 part underwater epoxy available from the pool store is used, below are the best 2 kinds: On the left is A+B manufactured by HB Fuller, on the right ATLAS EPOXY BOND. A+B is thicker and is best used in warm weather, in winter I use ATLAS. WARNING: Once the epoxy is mixed and applied to the leak, the water pressure can push through the soft epoxy. This can be eliminated by mixing the putty with about 1/3rd fine sand until the mixture feels thicker. Keep your hands dry when mixing, or water in the putty mix will cause the putty to flake. Always premix a ping ball size piece of epoxy, roll it into a rope, and bring it with you and seal anything your not sure about.
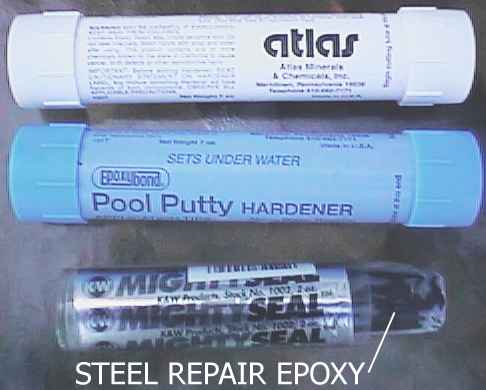
I just came across
this product in the home depot, PL Ultimate ,$8, is an sealant that can be
applied underwater, Its flexible and water proof formula replaces silicon and
can be used to seal tile lines and cracks in pool walls with the pool full. The
company claims it should not be submersed permanently, but I think they are
trying to limit liability.
Using the inspection mirror:
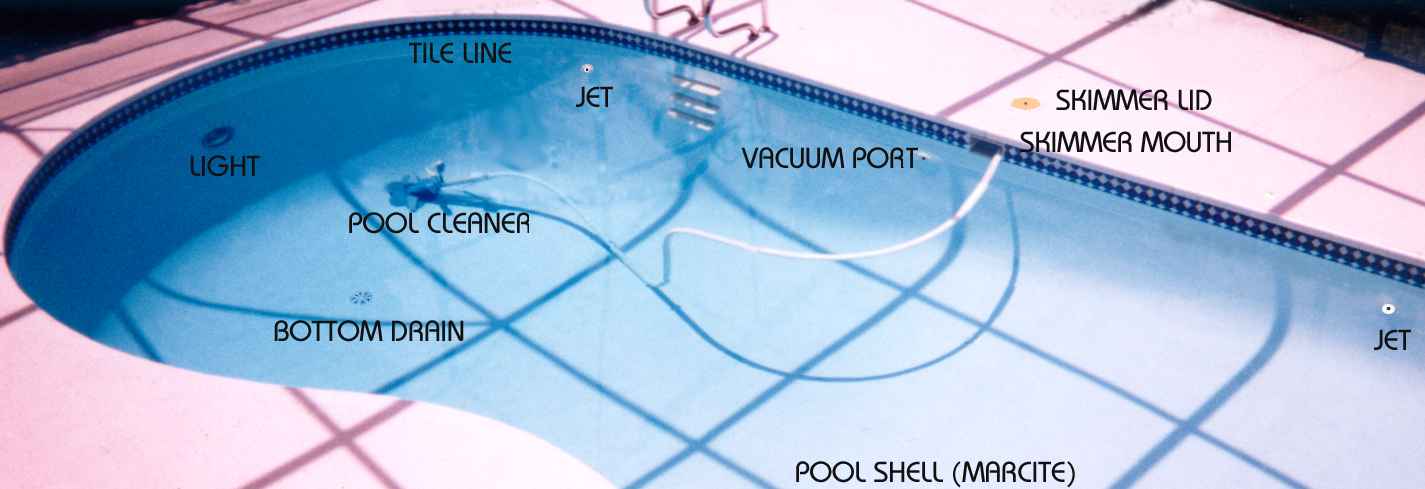
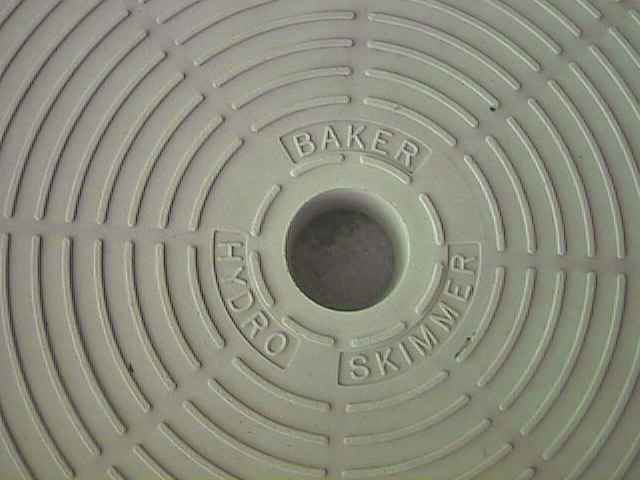
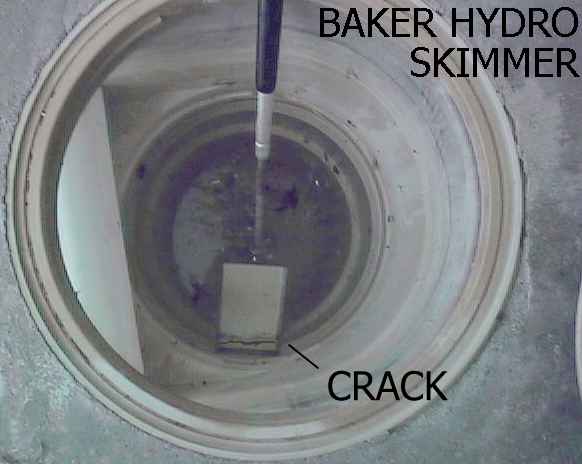
Most of the leak detection can be done from the deck with an inspection mirror. With a skimmer called the BAKER HYDRO, it in necessary to see this common leak, because a protruding rib hides it right were the vacuum plate sits. see skimmers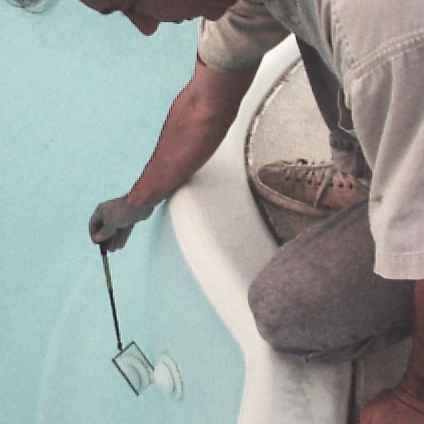
 .
.
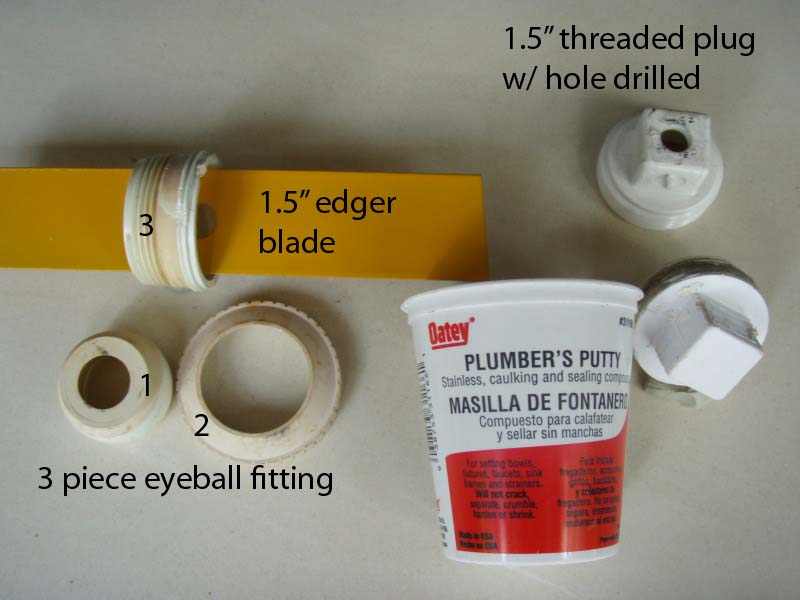
The yellow tool is a 1.5" edger blade (from a mower shop) it removes the eyeball fitting that is left in the pipe after the outside pieces are unscrewed. It fits in the notches in most fittings so you can unscrew them and inspect the threads. The threaded plugs are sewer caps available at hardware stores. One quick trick to test the plumbing is to plug off all jets but one, inserting a plug with the hole drilled in it in the last one. The plug with the hole is dye tested. If dye does not get drawn in the pipes are not leaking.
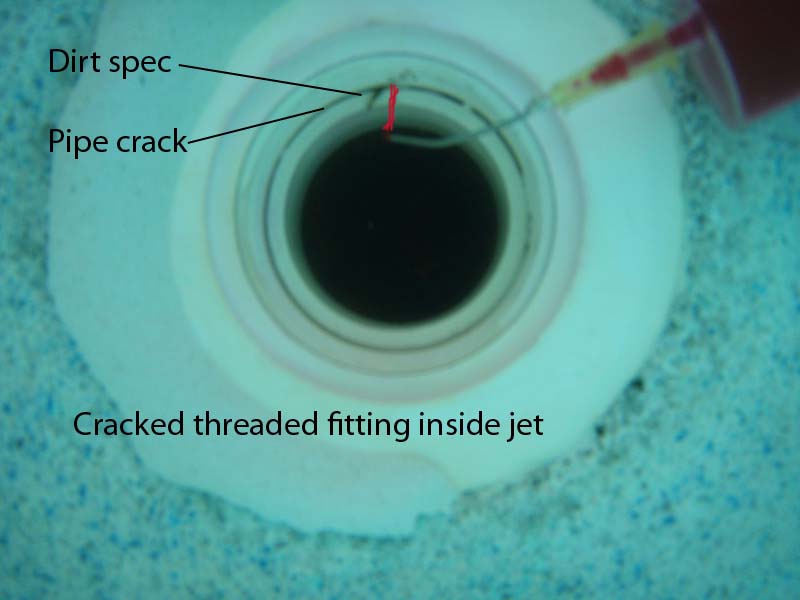
Another reason to remove the jet faces is to test the threads just inside the pipe. The leak will usually be on the top of the pipe.
Other tips:
A pool usually looses more water with the pump on because sediment that is attracted to the leak will be dislodged, when the pump is off the sediment settles to the leak. Leaks can clog themselves with leaves and the water level will appear to stop at a certain place. Look for dog hair and leaves that are stuck in odd places. This is common in bottom drains.
Never get the idea to dig up the pipes in the yard hoping to find a broken pipe. To test for a broken pipe, use the dye in the mouth of the pipe, the dye will be drawn into the jet pipe. Pipes usually break under the deck. See broken pipes.
Many people tell me their pools drain below the skimmer and therefore this eliminates the skimmer. Not always true.
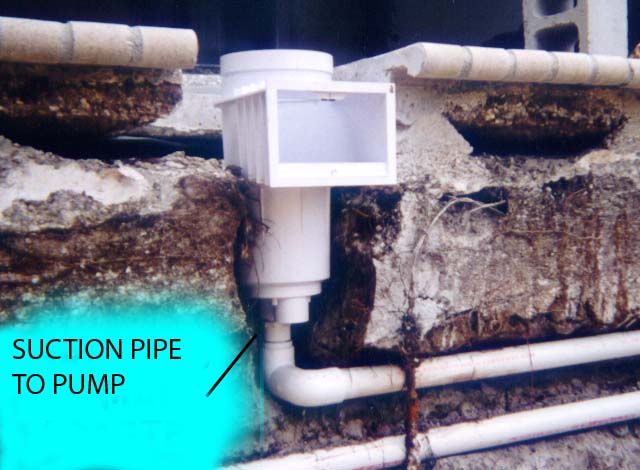
Skimmers have 2 types of plumbing- if it has one pipe in the bottom it will run to the pump. like the picture to the left. with one pipe, the water should not equalize with level of the pool. This skimmer should hold water if it filled with a garden hose
This skimmer has 2 pipes in the bottom, one to the pump- the other to the bottom drain. with this setup the water will alway equalize to the level of the pool. This setup will not hold water from a garden hose unless the bottom drain pipe is plugged off.
...............TOP.................................... BACK TO MAIN ..................... LINKS TO LEAKS