LEAKS IN LIGHTS
..BACK TO LINKS.................................... BACK TO HOME
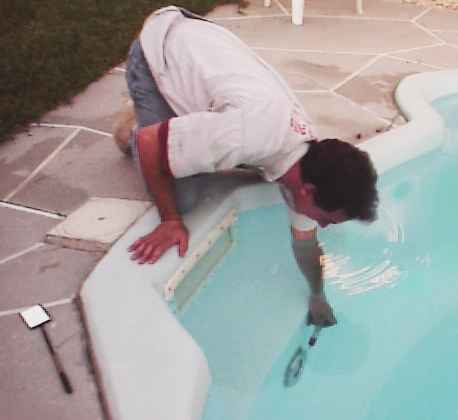
Warning: To avoid electric shock, Turn off the power to the light at the breaker box before you begin. If you approach a light and feel a tingle in your fingers its time to call an electrician.
Most lights burn at 400 watts, so the light needs to be water cooled and has water behind it and water even rises up the electric conduit. If the electric conduit breaks, the leak will stop above the light.
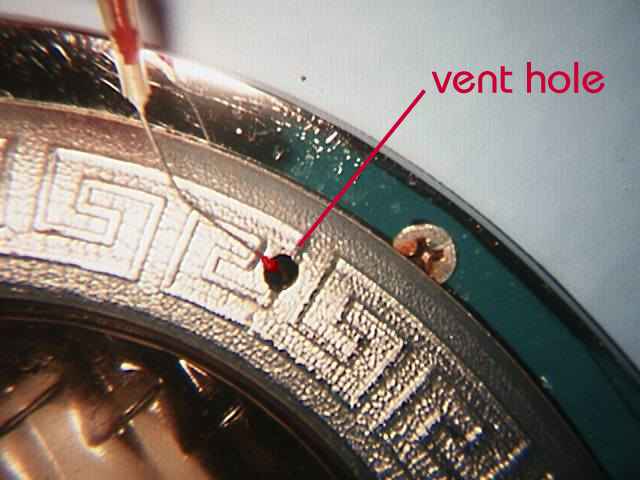
Lights have about 4 different places they can leak. While you are first testing the pool, lean over the edge and carefully squirt dye near one or 2 of the vent holes. If the pool is loosing 1/2" or more and the light is fit fairly tight in its pot (no large gaps around the ring) then the dye should slowly draw into the vent hole. If the dye doesn't draw in, and the rest of the pool looks good from the deck, it is time to move on until you test the bottom drain.
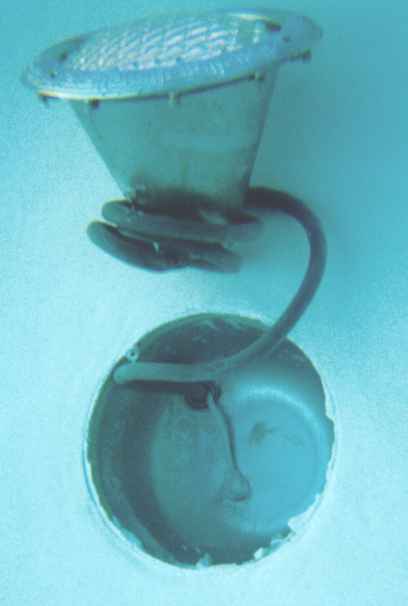
Most lights have one screw holding it in place at the top, remove it and pull gently, the light will float up and out of the pot. The electric cord is curled neatly around the base.
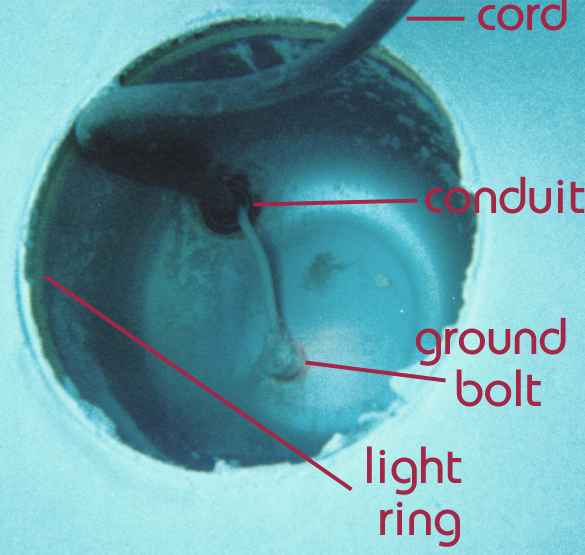
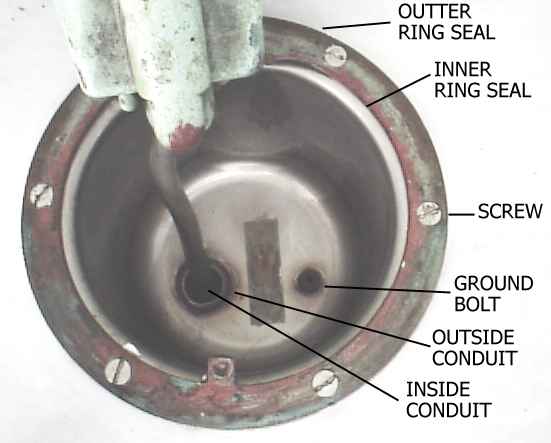
The light ring should have a good layer of glue in it, unlike the one to the left. The problem with these rings is that some leaks are so long and thin that the drawing action of the dye is not always visible. The other problem is the dirt behind the light gets stirred up and will clog the leak as you pull the light out. If your ring is not sealed well or you just want to be sure: scrub it with a wire brush then seal it with epoxy any way. Use your inspection mirror, and be sure to check under the screw hole.
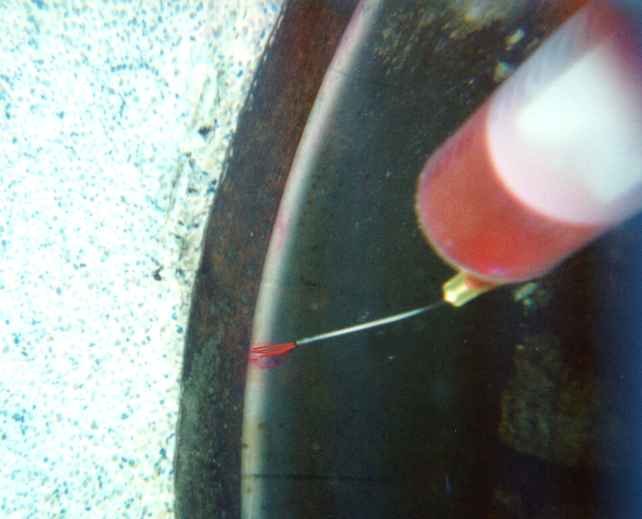
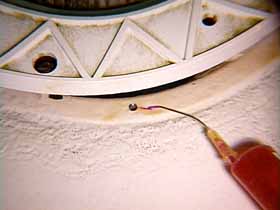
In the picture below, left, notice the flat red orange color of the copper conduit and the ground bolt. These fittings have been attacked by acidic water, which will cause leaks when the copper is corroded. The conduit and bolt are both leaking rapidly, but the leak is very thin, and will need to be dye tested to be seen. These leaks are sealed underwater with steel repair epoxy, right.
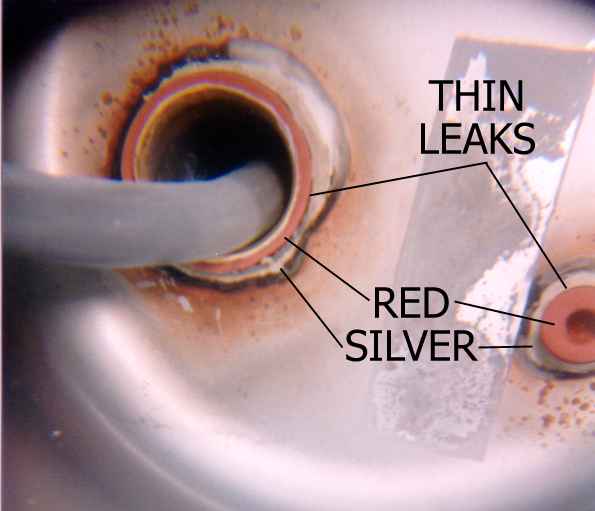
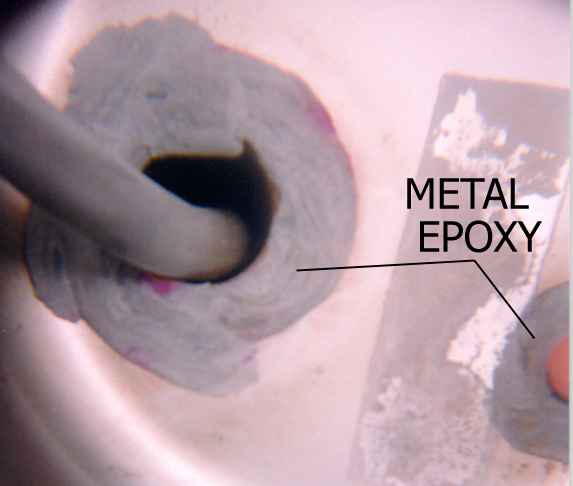 Another leak can form if the conduit (the pipe carrying the wire in it) to the light
breaks this will draw dye directly up the pipe in the back of the light. This is tricky to
repair because the wire moves around before the epoxy hardens. I recommend packing the
conduit deep with as much epoxy as you can, leaving the front flush. Let it harden over
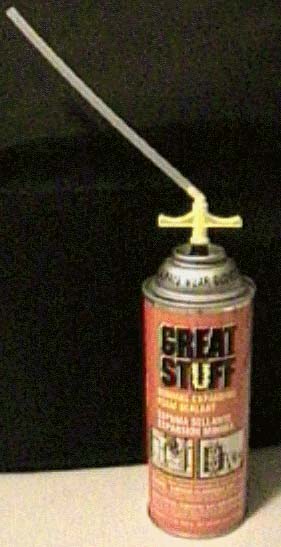
night, then reseal the front again. . Another method to seal a conduit is with an canned
insulation known as "great stuff" sold at the Home Depot (shown below). This insulation works
under water, but can get messy and can be dangerous if it expands up the conduit
into the electrical box.. Just stick the tube in the conduit and blast it for 6
seconds-it works every time. The drawback is the cord of the light cant be removed later
on to replace the light fixture.
Another leak can form if the conduit (the pipe carrying the wire in it) to the light
breaks this will draw dye directly up the pipe in the back of the light. This is tricky to
repair because the wire moves around before the epoxy hardens. I recommend packing the
conduit deep with as much epoxy as you can, leaving the front flush. Let it harden over
night, then reseal the front again. . Another method to seal a conduit is with an canned
insulation known as "great stuff" sold at the Home Depot (shown below). This insulation works
under water, but can get messy and can be dangerous if it expands up the conduit
into the electrical box.. Just stick the tube in the conduit and blast it for 6
seconds-it works every time. The drawback is the cord of the light cant be removed later
on to replace the light fixture.
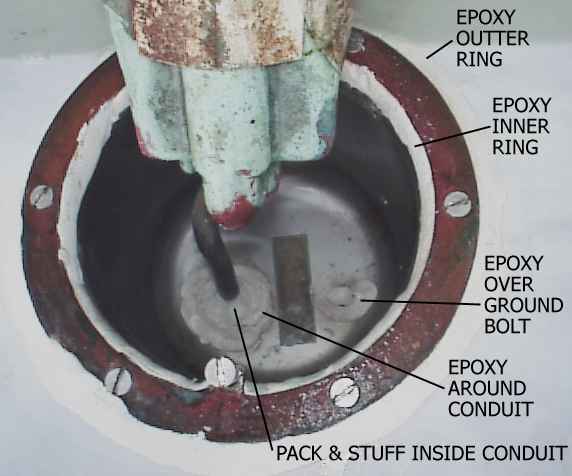
Below is a light from a fiberglass pool that got the full epoxy treatment
 ..
..
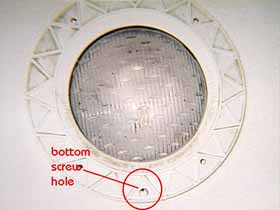
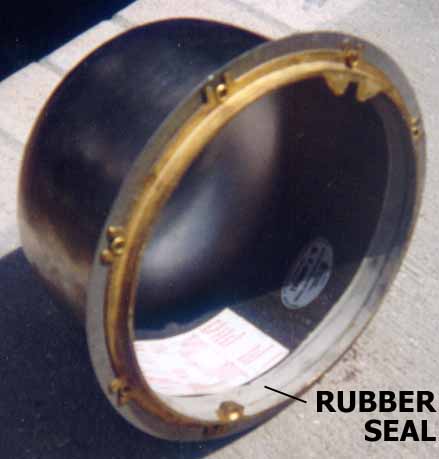
This light has a star pattern around a plastic ring. It has screw holes on the top and bottom that corrode and leak. I've had good luck with foam in these holes.
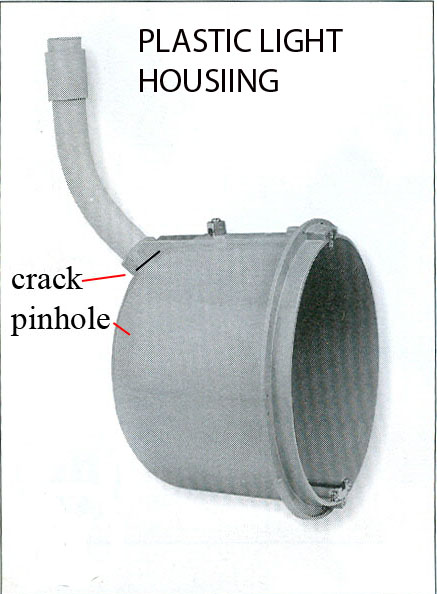 Newer
pools have a plastic light housing. These can crack upon installation when the
dirt is packed on top of the conduit. The crack will appear on either side of
the conduit. These cracks can keep growing. Sand and seal with epoxy.
Newer
pools have a plastic light housing. These can crack upon installation when the
dirt is packed on top of the conduit. The crack will appear on either side of
the conduit. These cracks can keep growing. Sand and seal with epoxy.
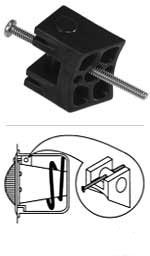
If you broke the screw off during removal, and the light just floats out, pool stores sell a "LIGHT WEDGE" that secures the light back into the pot. Sometimes I've used 2 for stubborn lights.
..............BACK TO LINKS.......................... TOP..................................... BACK TO MAIN